11 Dollar Tree Kitchen Pantry Organization Ideas
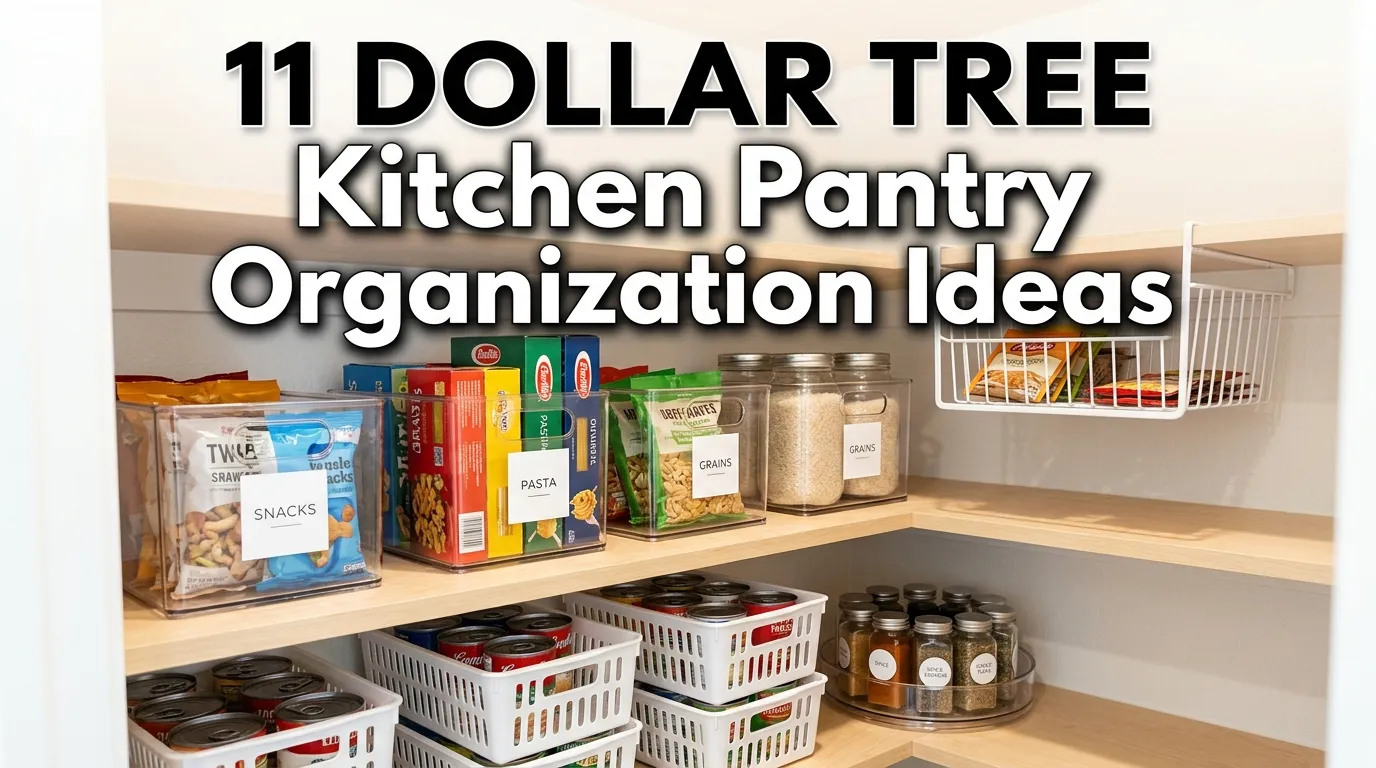
A pantry doesn’t have to be large, expensive, or custom-built to stay organized. Sometimes the biggest difference comes from a few inexpensive containers, baskets, labels, and smart storage zones. That’s what makes Dollar Tree pantry organization so appealing: you can experiment with different solutions without committing to a major home-improvement budget.
A cluttered pantry often becomes difficult to use because similar items get pushed behind one another. Snacks disappear, cans pile up, half-used bags take over shelves, and ingredients you already own get forgotten. The goal isn’t simply to make everything look pretty. A well-organized pantry should make everyday cooking faster and help you see what you have at a glance.
In my experience, the most successful pantry systems are the ones that are simple enough to maintain. You don’t need matching containers for every ingredient. Instead, focus on grouping similar foods, using vertical space, creating easy-to-reach zones, and choosing storage pieces that fit your shelves.
Dollar Tree is particularly useful for testing these ideas because inexpensive organizers can help you discover what actually works before investing in more expensive storage products.
From snack bins and canned-food organizers to cereal storage and door-mounted solutions, these ideas can help you turn a crowded kitchen pantry into a practical, attractive space without spending a fortune.
Table of Contents
1. Snack Storage Bins
Create easy grab-and-go zones for individually packaged snacks and small food items.
2. Canned Food Risers
Arrange canned goods in tiers so labels stay visible and nothing gets forgotten.
3. Clear Container Zones
Group dry ingredients in simple containers to create a cleaner, more cohesive pantry.
4. Wire Basket Storage
Use lightweight baskets to collect loose packages and prevent shelf clutter.
5. Cereal Organization
Keep cereal boxes and bags together while making breakfast items easier to access.
6. Pasta And Grain Bins
Create organized zones for pasta, rice, grains, and other frequently used staples.
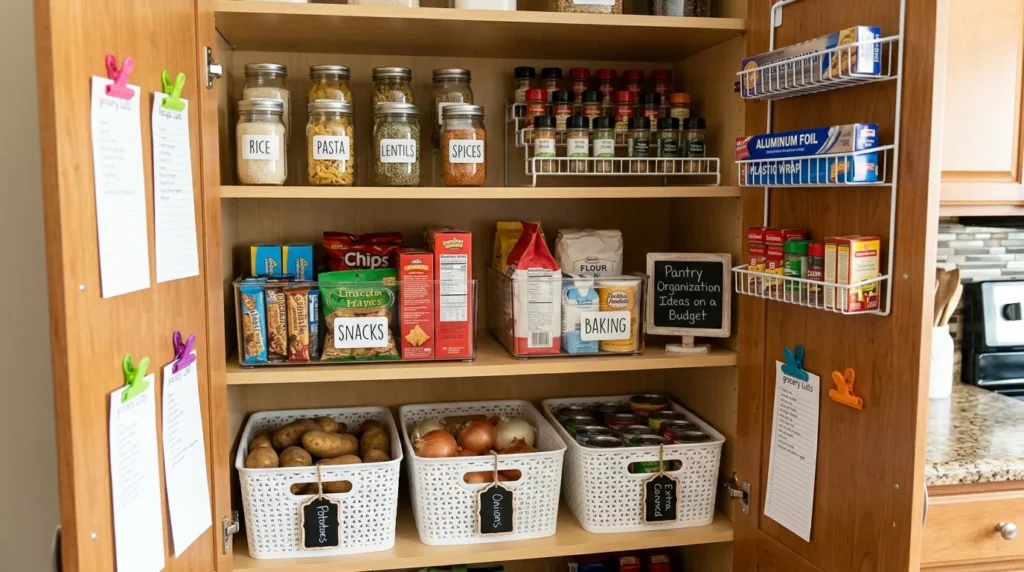
7. Pantry Door Storage
Use the back of the pantry door to create additional storage for small essentials.
8. Baking Supply Bins
Keep flour, sprinkles, mixes, and baking accessories grouped in one convenient zone.
9. Labelled Food Baskets
Make categories instantly recognizable with simple labels and dedicated baskets.
10. Vertical Shelf Space
Take advantage of unused height with stackable organizers and shelf inserts.
11. Everyday Pantry Zones
Arrange frequently used foods where they’re easiest to reach and maintain.
1. Snack Storage Bins
Quick Benefits
- Keeps small packages contained
- Makes snacks easier to find
- Reduces shelf clutter
- Creates grab-and-go storage
- Works well for families
Why It Works
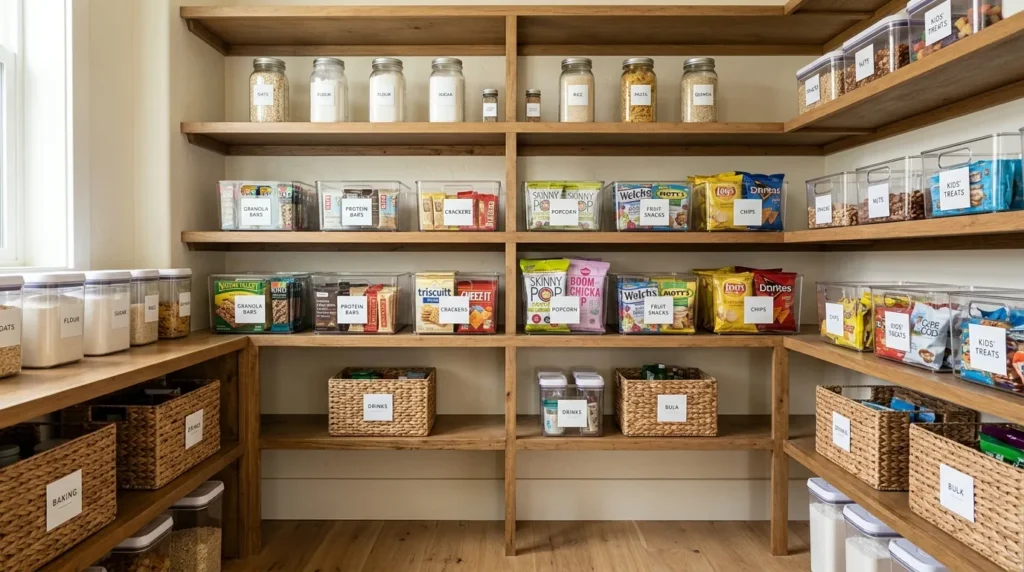
Snack packages are some of the easiest pantry items to lose control of. Individual granola bars, crackers, fruit snacks, popcorn packets, and small bags can quickly spread across an entire shelf. A few inexpensive plastic bins create a defined home for these items and make the pantry easier to scan. Instead of searching through several shelves, family members can immediately see where snacks belong. The system also makes restocking easier because you can quickly tell when a category is running low. The important part is choosing a bin size that matches the shelf rather than buying organizers first and trying to make them fit afterward.
How To Style It
Use several matching or coordinating bins to create simple categories such as Kids’ Snacks, Bars, Crackers, and Treats.
Place the bins on a shelf that’s easy for everyone to reach. If children regularly choose their own snacks, keep appropriate options at a comfortable height.
Avoid overfilling. When a bin becomes too crowded, items become difficult to remove and the organization quickly breaks down.
For a clean pantry aesthetic, choose clear or neutral bins and add simple labels to the front.
You can also reserve one bin for individually packaged items that tend to migrate around the kitchen.
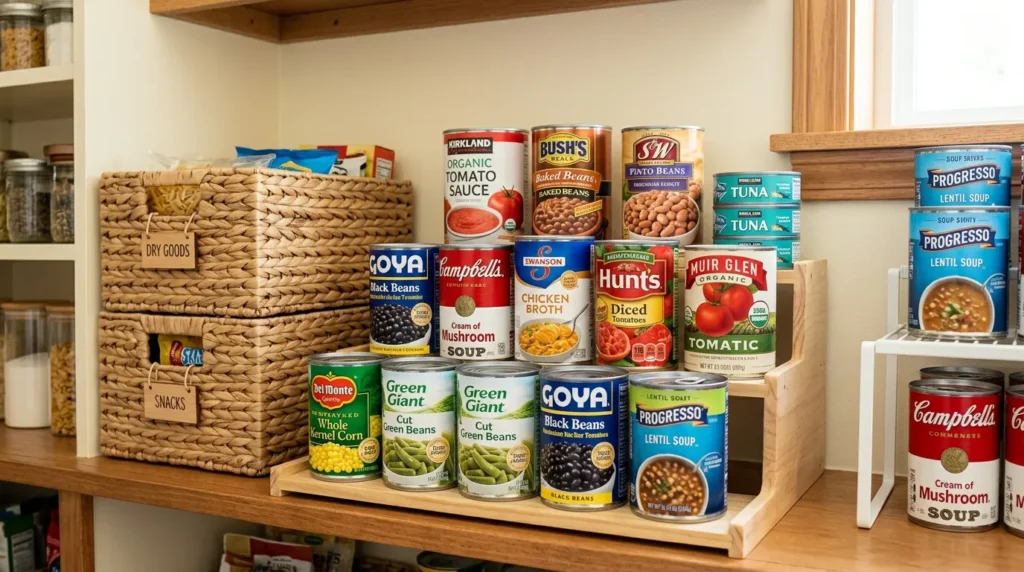
2. Canned Food Risers
Quick Benefits
- Keeps labels visible
- Uses shelf depth efficiently
- Prevents cans from hiding
- Makes inventory easier
- Creates a tidy appearance
Why It Works
Canned foods often create one of the most frustrating pantry problems: the cans in the back disappear from view. A tiered arrangement solves this by raising the second and third rows so you can see more labels at once. You don’t necessarily need a specialized pantry organizer to achieve the effect. Depending on your shelf dimensions, inexpensive shelf inserts, small risers, or sturdy household organizers can create additional levels. The goal is to avoid stacking cans so high that they become unstable while still making maximum use of the shelf depth.
How To Style It
Group cans by category rather than placing them wherever there’s room.
Keep vegetables together, soups together, beans together, and canned tomatoes together.
Use a riser toward the back of the shelf and place the shorter cans toward the front where they’re easy to see.
Before purchasing an organizer, measure both the shelf depth and vertical clearance.
A simple label on the shelf edge can make the system even easier to maintain.
If your household buys canned goods in bulk, leave a little extra room for newly purchased items rather than filling every space immediately.
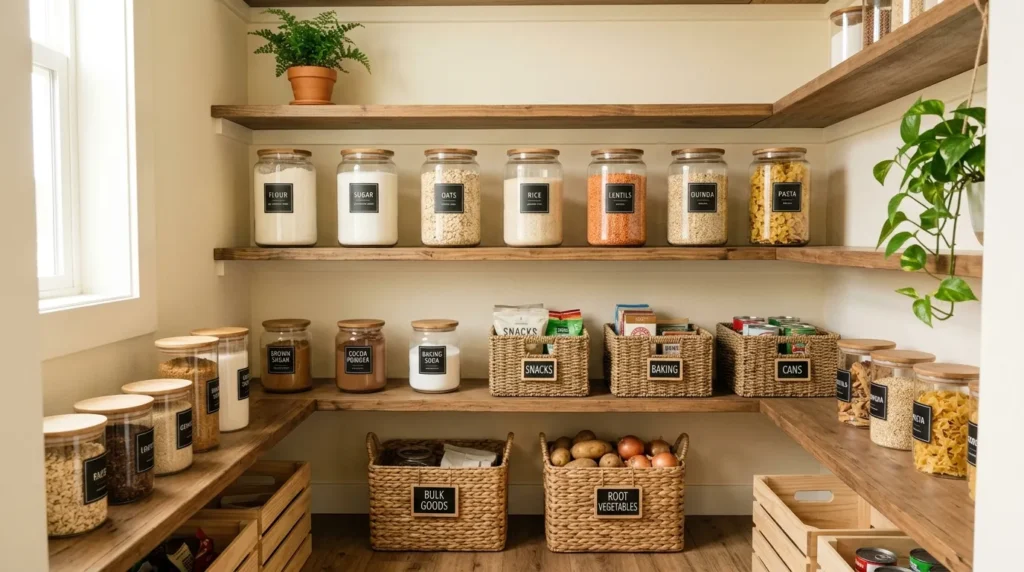
3. Clear Container Zones
Quick Benefits
- Creates visual consistency
- Makes ingredients easier to identify
- Helps monitor quantities
- Reduces packaging clutter
- Protects dry goods from pantry messes
Why It Works
Clear containers can make a pantry feel dramatically more organized because you can see what is inside without opening every package. They’re particularly useful for frequently used dry goods such as flour, sugar, rice, cereal, oats, or baking ingredients. However, there’s no need to transfer every food in your pantry into containers. That can become expensive and time-consuming. Instead, focus on foods that are frequently used, prone to messy packaging, or difficult to store in their original bags.
How To Style It
Choose a small group of foods that benefit most from containers.
For example, create one zone for breakfast staples and another for baking ingredients.
Use containers that fit comfortably beneath your shelves and leave enough headroom to remove them easily.
Add simple labels if several ingredients look similar.
When transferring food, keep the original package information and expiration details available according to your household’s preferred food-storage routine.
Most importantly, don’t choose containers simply because they look attractive. Their size and shape should make sense for the food and your pantry.
4. Wire Basket Storage
Quick Benefits
- Contains loose packages
- Adds accessible storage
- Creates flexible categories
- Makes deep shelves easier to manage
- Adds texture to the pantry
Why It Works
Wire baskets are useful when you have lots of packages that don’t stack neatly. Instead of allowing bags and boxes to spread across the shelf, place similar products inside one basket. This creates a portable category that can be pulled forward when needed. Baskets are especially helpful on deep shelves because they can prevent smaller items from getting pushed toward the back. The trick is to avoid turning every basket into a miscellaneous container. Each basket should have a clear purpose.
How To Style It
Use one basket for items such as tortillas and wraps, another for sauces and packets, and another for backup pantry goods.
Place heavier baskets on lower shelves and lighter categories higher up.
Choose baskets with openings that allow you to see enough of the contents.
If your pantry has a neutral color scheme, white, black, beige, or natural-looking organizers can keep the space visually calm.
Label each basket clearly so everyone in the household knows where things belong.
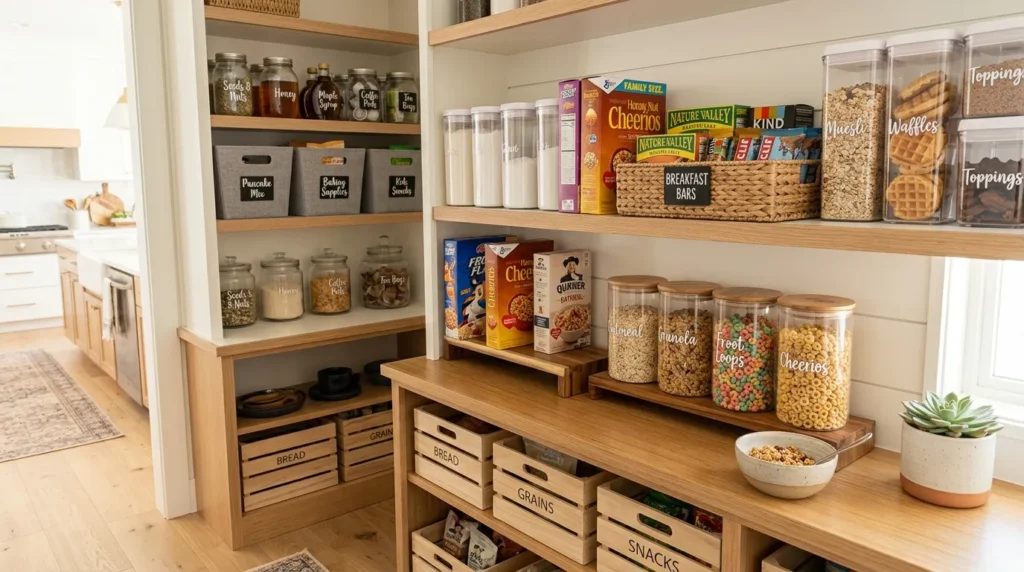
5. Cereal Organization
Quick Benefits
- Keeps breakfast items together
- Reduces bulky packaging
- Makes mornings easier
- Uses shelf space efficiently
- Creates a dedicated food zone
Why It Works
Cereal boxes can take up considerable pantry space, especially when several varieties are stored together. Creating a dedicated breakfast zone makes the pantry easier to navigate and keeps morning staples in one location. If you use cereal containers, choose food-safe storage specifically intended for food and make sure the container is appropriately sized. For households that prefer keeping cereal in its original packaging, a simple basket can still create a cleaner arrangement.
How To Style It
Group cereal, oatmeal, breakfast bars, and pancake supplies on adjacent shelves if your layout allows.
A large basket can hold individual cereal bags or smaller breakfast packages.
Alternatively, use appropriately sized airtight food-storage containers for cereals you purchase frequently.
Place everyday breakfast items at eye level while reserving higher shelves for backup supplies.
Add a small label such as Breakfast to visually define the area.
Keeping the category together means you can quickly check your inventory before grocery shopping.
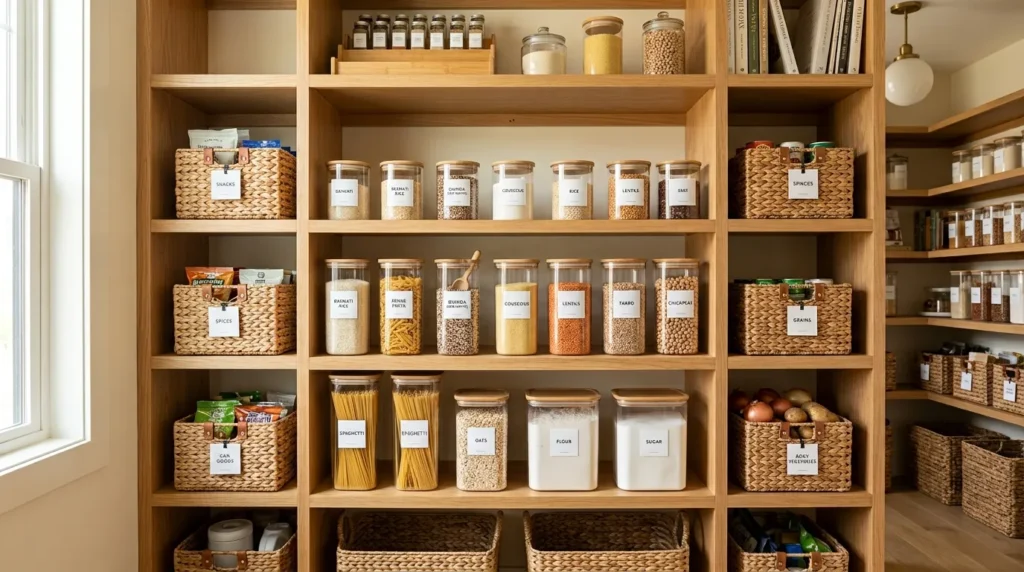
6. Pasta And Grain Bins
Quick Benefits
- Keeps staple foods organized
- Makes ingredients easy to see
- Reduces torn packages
- Creates useful categories
- Simplifies meal preparation
Why It Works
Pasta, rice, quinoa, couscous, and other grains can come in awkward bags and boxes that don’t always stack efficiently. Grouping these foods together gives the pantry a logical structure. Clear containers can be particularly helpful for ingredients purchased frequently, while baskets work well when you prefer keeping original packaging. The key is creating a system based on how you cook. If pasta is used several times a week, it deserves an accessible location rather than being stored on a difficult-to-reach top shelf.
How To Style It
Create one section labeled Pasta & Grains.
Use containers for loose dry goods when appropriate, or arrange boxed pasta vertically inside a basket.
Keep frequently used varieties toward the front.
If you have multiple types of rice or pasta, organize them by type instead of mixing everything together.
Avoid storing too many categories in one container or basket. A clear distinction between foods makes the pantry much easier to maintain.
7. Pantry Door Storage
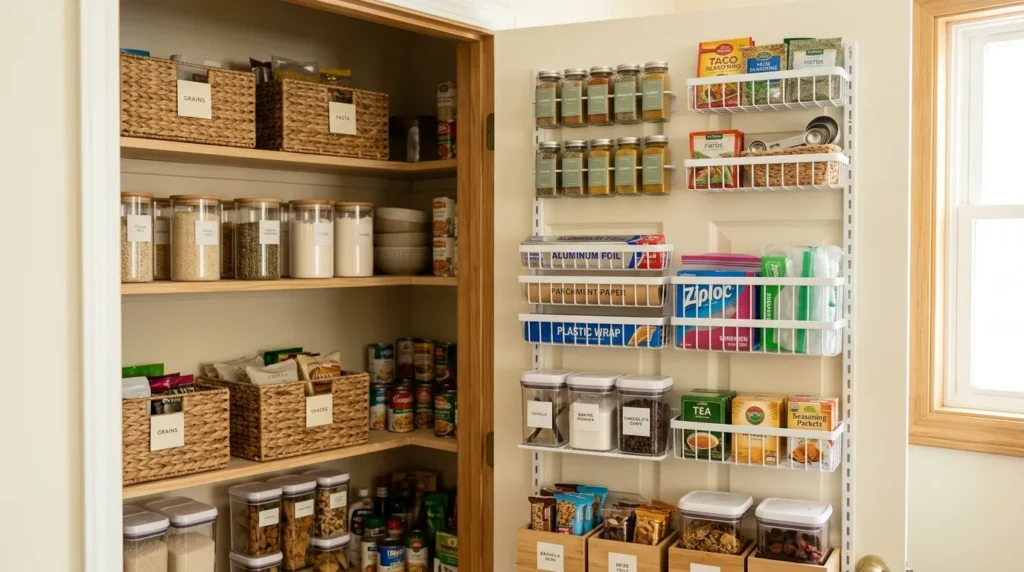
Quick Benefits
- Uses overlooked space
- Adds extra capacity
- Works for small items
- Keeps shelves less crowded
- Makes frequently used products accessible
Why It Works
The back of a pantry door is often completely unused, even though it can provide valuable storage space. Depending on the door construction and organizer design, this area can hold small lightweight items such as spice packets, snack bags, measuring tools, or wraps. Door storage is especially useful in compact kitchens where every inch matters. However, not every pantry door is suitable for adhesive or hanging organizers, so check the product’s weight limits and installation requirements before adding one.
How To Style It
Use shallow bins or appropriate over-the-door organizers for lightweight pantry items.
Create categories rather than placing random products into every pocket.
For example, one section could hold baking decorations, another could contain food-storage bags, and another could store seasoning packets.
Keep heavier items on fixed shelves rather than loading the door.
Make sure the door closes properly and doesn’t interfere with shelves or stored food.
This is one of the easiest ways to gain functional storage without changing the pantry’s basic layout.
8. Baking Supply Bins
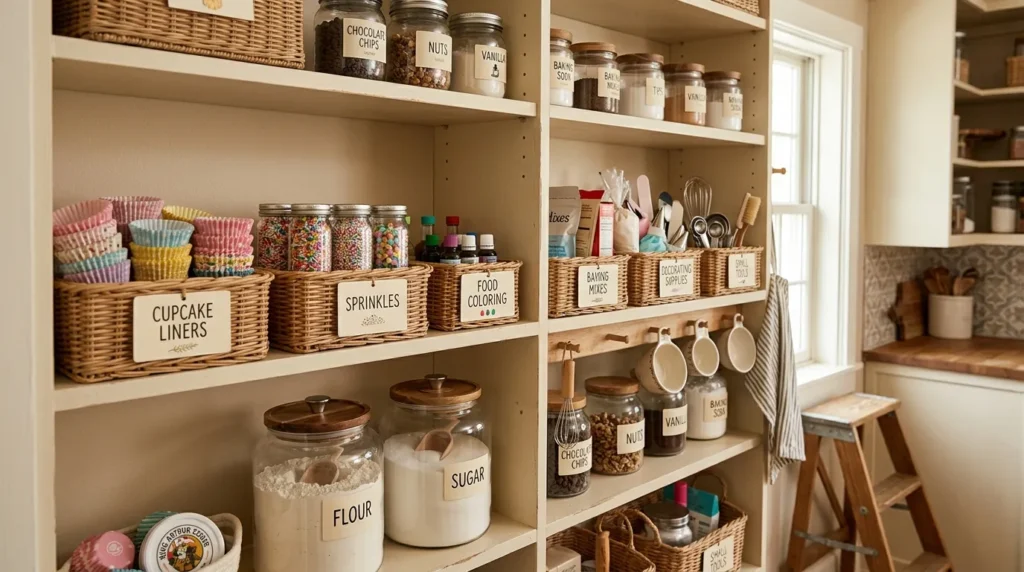
Quick Benefits
- Keeps baking ingredients together
- Prevents small items from spreading
- Makes seasonal baking easier
- Simplifies meal preparation
- Creates clear categories
Why It Works
Baking supplies tend to include many small items: sprinkles, cupcake liners, decorating tools, extracts, mixes, food coloring, and specialty ingredients. Without a dedicated zone, these products can become scattered throughout the pantry. A simple basket or bin can collect related supplies and turn them into one easy-to-access category. This is particularly useful before holidays when baking supplies tend to increase.
How To Style It
Create a Baking basket for smaller packaged supplies.
Keep larger staple ingredients such as flour and sugar nearby but separate if they’re stored in containers.
Use small organizers inside the basket to separate decorating items from ingredients.
Place frequently used baking supplies at an accessible height.
For seasonal items, consider a separate labeled container that can be moved into the pantry when needed.
The goal is to make baking preparation easier—not to create another complicated organizational system.
9. Labelled Food Baskets
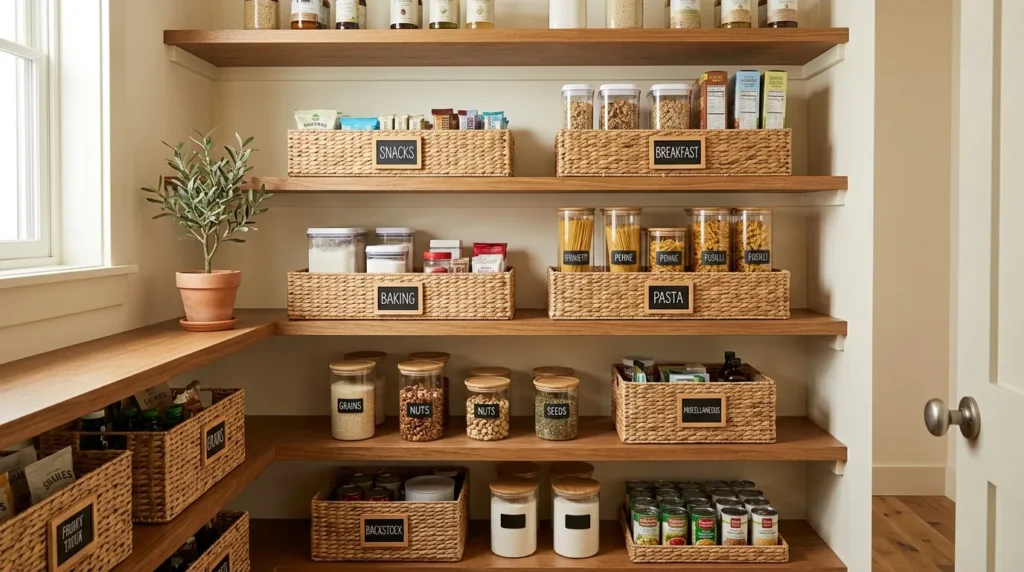
Quick Benefits
- Makes categories obvious
- Helps the whole household
- Speeds up cleanup
- Creates visual consistency
- Simplifies restocking
Why It Works
An organization system only works when people know where things belong. Labels eliminate uncertainty. Instead of wondering which basket should hold crackers or baking supplies, everyone has a visual cue. Labels don’t need to look elaborate. Simple printed labels, handwritten tags, or adhesive labels can work perfectly well. The best categories are broad enough to remain useful but specific enough to prevent the basket from becoming a catch-all.
How To Style It
Choose categories based on your household’s actual shopping habits.
Useful examples include:
- Snacks
- Breakfast
- Baking
- Pasta
- Grains
- Canned Goods
- Sauces
- Backstock
Use consistent labels throughout the pantry.
Place labels where they’re easy to see when you’re standing in front of the shelf.
Avoid creating too many categories. If you have twenty tiny labels for a small pantry, the system can become more complicated than the problem you’re trying to solve.
10. Vertical Shelf Space
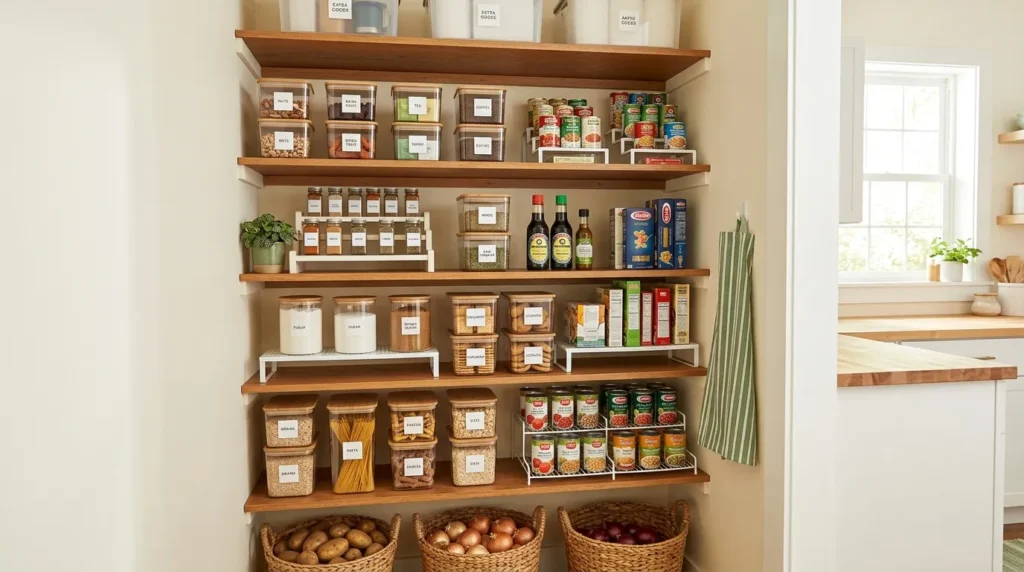
Quick Benefits
- Uses unused height
- Adds storage levels
- Makes small items visible
- Reduces wasted shelf space
- Improves pantry capacity
Why It Works
One of the most common pantry problems is wasted vertical space. A shelf may have enough height for a tall cereal box, while shorter cans and jars occupy only the bottom half. Shelf inserts and stackable organizers can create an additional level, allowing you to use that empty space. This approach is especially effective for small kitchens because it increases usable storage without requiring additional cabinetry. Before stacking anything, however, make sure the organizer is stable and appropriate for the weight of the items.
How To Style It
Use shelf risers for cans, jars, or small boxes.
Place taller products toward the back and shorter products where they’re easy to see.
Use stackable bins for lightweight packaged foods.
Don’t stack heavy items too high where they could become difficult or unsafe to retrieve.
Leave enough clearance between shelves so you can remove containers without knocking neighboring items over.
A little vertical planning can make a surprisingly large difference in a crowded pantry.
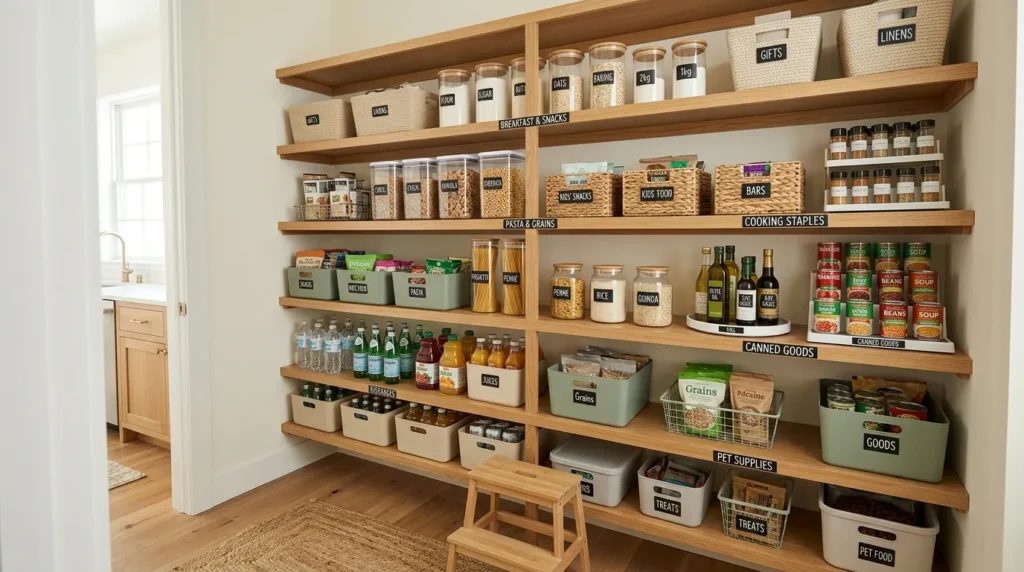
11. Everyday Pantry Zones
Quick Benefits
- Makes cooking easier
- Reduces searching
- Encourages organization
- Improves pantry visibility
- Creates a sustainable system
Why It Works
The most effective pantry organization system is based on how you actually use your kitchen. Instead of organizing purely by appearance, create zones around everyday routines. Breakfast foods can live together, baking supplies can share a section, and frequently used cooking staples can stay within easy reach. This reduces the number of decisions you make while cooking and makes putting groceries away much simpler. A pantry doesn’t need to look like a showroom to be successful. It needs to make everyday life easier.
How To Style It
Start by removing everything from one shelf at a time rather than emptying the entire pantry if that feels overwhelming.
Group similar items together and identify which categories you use most often.
Place everyday staples between waist and eye level whenever possible.
Reserve higher shelves for backup products and less frequently used ingredients.
Use inexpensive baskets and containers only where they solve a specific problem.
Leave a little breathing room between categories. This makes it easier to put groceries away and prevents the pantry from immediately returning to its previous state.
How To Organize a Pantry on a Dollar Tree Budget
The best approach is to organize first and shop second.
Before buying anything, remove expired or unwanted products and group the remaining items by category. You may discover that you already have enough containers or baskets to solve some of your storage problems.
Then measure your shelves.
Measure:
- Shelf width
- Shelf depth
- Vertical clearance
- Door clearance
- Space between shelves
These measurements will prevent you from buying organizers that don’t fit.
Next, identify your biggest problem areas. If snack packages are constantly scattered, start with bins. If cans disappear behind one another, prioritize risers. If the pantry has significant unused vertical space, look for shelf inserts.
You don’t need to organize the entire pantry in one afternoon. Start with the area that causes the most frustration.
Dollar Tree Pantry Organization Mistakes to Avoid
Buying Before Measuring
An organizer that looks perfect in the store may be too wide or too tall for your shelves. Measurements should come first.
Using Too Many Containers
Transferring every food into individual containers can create unnecessary work. Use containers where they genuinely improve storage.
Creating Tiny Categories
Too many labels can make the pantry harder to maintain. Keep categories broad and intuitive.
Ignoring Accessibility
Beautiful organization isn’t useful if everyday foods are stored behind rarely used items.
Overfilling Bins
A basket that’s packed to the top isn’t organized for long. Leave enough room to add and remove products comfortably.
Forgetting Food Safety
Use storage products according to their intended purpose. Food should be stored in appropriate food-safe containers, and manufacturer’s instructions should be followed.
Frequently Asked Questions
Is Dollar Tree good for pantry organization?
Dollar Tree can be useful for inexpensive pantry organization because it allows you to experiment with baskets, bins, labels, and basic storage solutions without spending heavily. Availability varies by store and over time, so it’s best to choose organizers based on your pantry measurements and actual storage needs.
How do I organize a small pantry cheaply?
Start by decluttering, grouping similar foods, and using vertical space. Add inexpensive bins for loose packages, risers for cans, and shelf inserts where there is unused height. You don’t need matching containers throughout the pantry; prioritize the areas that create the most clutter.
What should go in pantry baskets?
Pantry baskets work well for loose or similarly packaged foods such as snacks, baking supplies, breakfast items, pasta, wraps, sauce packets, or backstock. Give each basket a specific category and label it so everyone knows what belongs there.
How can I make my pantry look organized?
Use broad categories, consistent labels, coordinated baskets where useful, and clear pathways between shelves. Keep frequently used items accessible and reserve high or deep storage for backup products. A little empty space can make the pantry look and function better.
How do I maximize pantry shelf space?
Use vertical shelf inserts, stackable organizers, and appropriately sized bins. Group items by height and frequency of use. The goal is to use empty vertical and horizontal space without making items difficult to reach.
Should I use clear containers in my pantry?
Clear containers can be helpful for frequently used dry goods because they make contents easy to identify. However, they aren’t necessary for every item. Use them selectively for foods where they improve visibility, reduce messy packaging, or make storage more efficient.
How often should I reorganize my pantry?
A quick reset every few weeks can prevent clutter from building up. A deeper review every few months is useful for checking expiration dates, removing foods your household no longer uses, and adjusting storage zones as your shopping habits change.
Conclusion
A well-organized pantry doesn’t have to come with a custom renovation or an expensive collection of matching containers. With a little planning, inexpensive organizers can solve many of the everyday problems that make kitchen storage frustrating.
The biggest improvement usually comes from creating clear categories. Give snacks, canned goods, baking supplies, breakfast foods, pasta, and everyday staples their own logical homes. Then use bins, baskets, risers, and shelf inserts only where they make those categories easier to access.
Before buying anything, measure your shelves and think about how your household actually uses the pantry. The prettiest system isn’t necessarily the best one. A practical system that everyone can maintain will always win.
And remember, you don’t have to organize everything at once. Start with one shelf or one problem area. Add a few inexpensive storage pieces, test the arrangement, and adjust as you go.
A pantry that is easy to see, easy to reach, and easy to reset can make everyday cooking feel noticeably less stressful—and that’s the real goal of good organization.