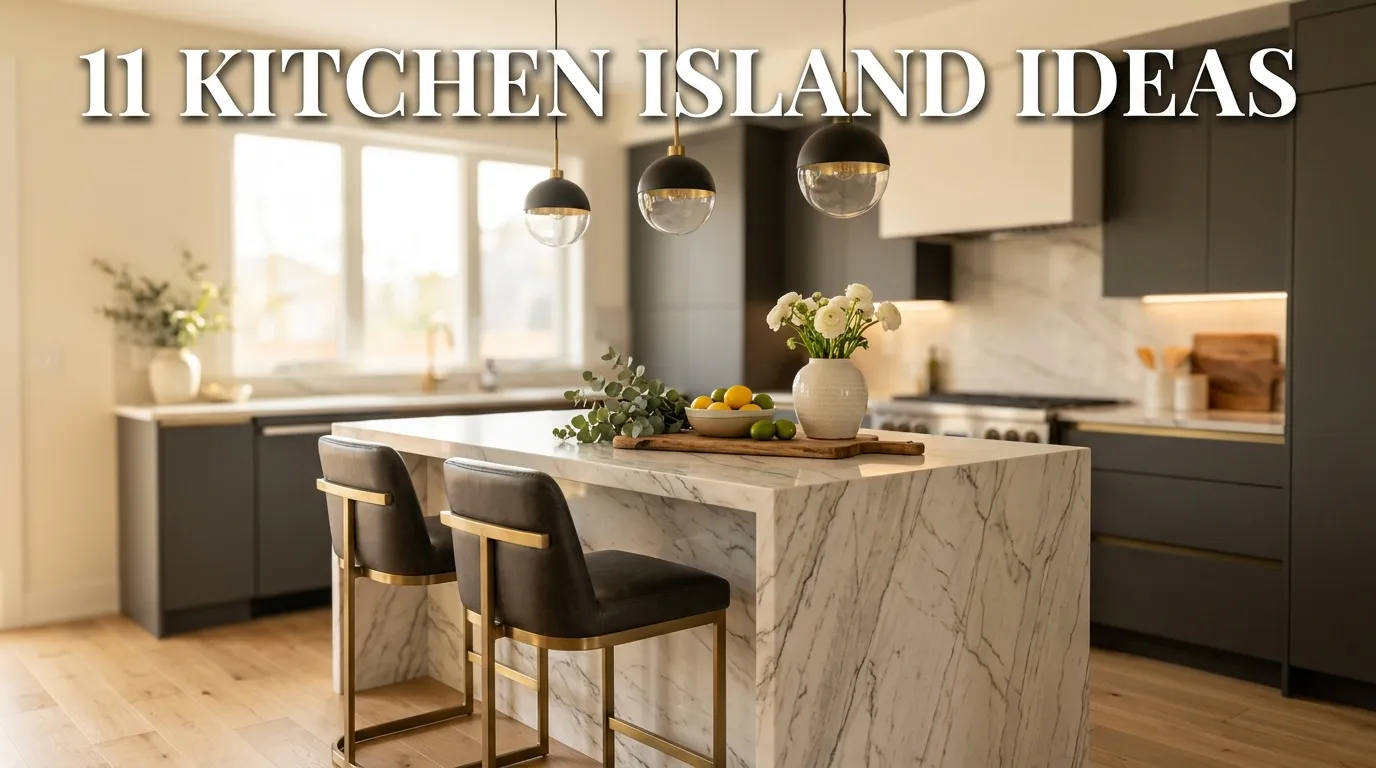
11 Kitchen Island Ideas
A kitchen island tends to become the busiest spot in the entire house, and in my experience, that’s exactly why it deserves more thoughtful planning than it often gets. It’s where meal prep happens, where kids do homework, where guests gather during a dinner party, and where morning coffee gets poured before anyone’s fully awake. A mistake many homeowners make is designing an island purely around how it looks in a showroom photo, without considering how many different jobs it actually needs to do in their specific household.
I’ve noticed that the kitchen islands people love most aren’t necessarily the biggest or most elaborate — they’re the ones built around how that particular household actually uses the kitchen day to day. A family that hosts frequently has different island priorities than a household of one or two people who mostly cook simple weeknight meals. That’s why many designers recommend starting with a clear list of how you actually want to use the island before choosing finishes or features, since form really does need to follow function here.
This article walks through eleven kitchen island ideas that balance genuine everyday usability with real visual appeal, covering everything from seating and storage to material choices and lighting. Each idea includes the reasoning behind why it works, along with practical guidance so you can figure out which combination makes the most sense for your specific kitchen and household.
One thing that works especially well with kitchen islands specifically is choosing a few standout features rather than trying to cram every possible function into one piece of furniture. An island trying to be a prep station, a dining table, a homework desk, and a bar all at once often ends up serving none of those functions particularly well.
Table of Contents
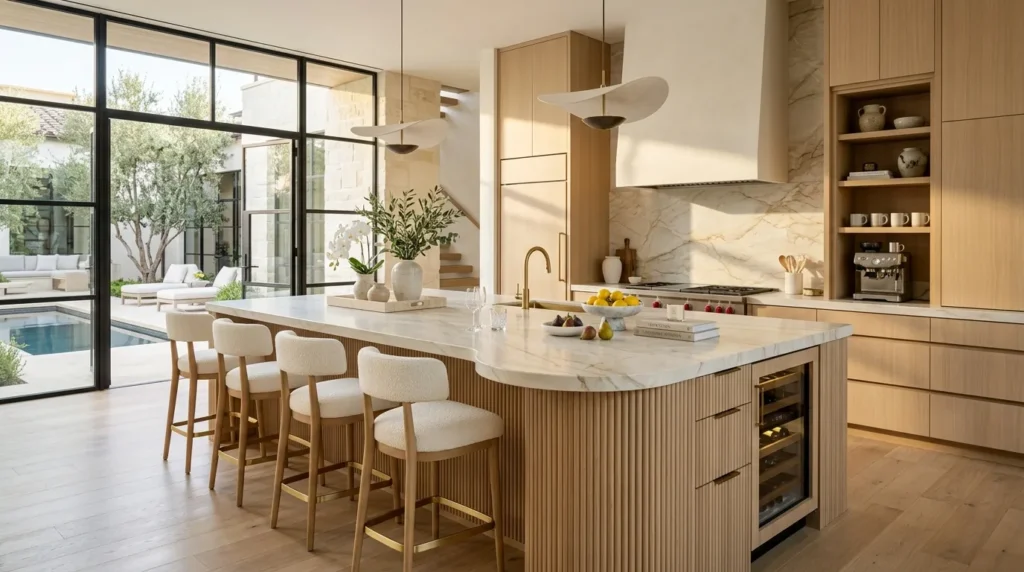
- Waterfall Countertop Edges — A sleek, modern material detail.
- Mixed Material Island Base — Combining wood, stone, and metal tones.
- Built-In Prep Sink Addition — A dedicated secondary workspace.
- Layered Pendant Lighting — Illumination that doubles as a design feature.
- Comfortable Counter Stool Seating — Everyday seating for meals and guests.
- Hidden Appliance Garage Storage — Concealing small appliances from view.
- Open Shelf Display Ends — Styling opportunities on island end panels.
- Contrasting Island Color Choice — A focal point through color alone.
- Butcher Block Prep Surface — A warm, functional cutting workspace.
- Deep Drawer Storage Systems — Practical organization for pots and pans.
- Charging Station Integration — Practical tech support built into the design.
1. Waterfall Countertop Edges
Quick Benefits
- Creates a sleek, architectural focal point
- Protects the island’s structural sides from wear
- Suits both modern and transitional kitchen styles
- Highlights natural stone veining beautifully
- Adds a polished, custom-feeling detail
Why It Works
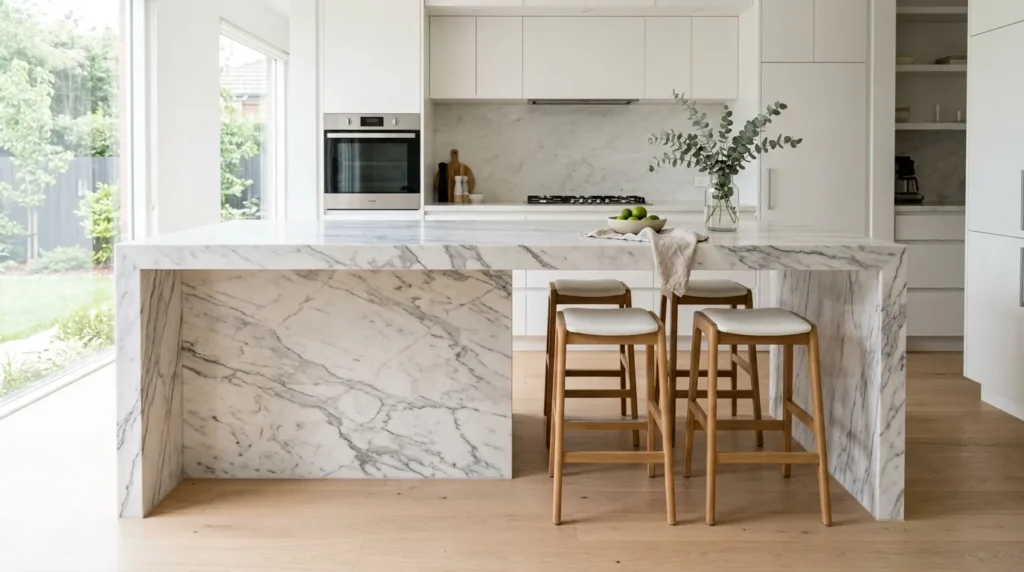
A waterfall edge, where the countertop material continues down the sides of the island rather than stopping at the top surface, creates a clean, uninterrupted look that reads as considerably more custom and architectural than a standard countertop edge. In my experience, this detail is often what elevates an island from looking like standard cabinetry with a countertop on top to feeling like a genuinely designed, cohesive piece of furniture. A mistake many homeowners make is assuming this detail is purely decorative, when it also protects the sides of the island from the everyday knocks and scuffs that painted or stained wood panels are more prone to showing over time.
How To Style It
Choose a countertop material with attractive veining or pattern if you want the waterfall edge to be a genuine visual focal point, since the continuous surface really showcases natural variation in materials like marble or quartzite. Ensure your fabricator has experience specifically with waterfall edge installation, since the mitered seam at the corner requires precise work to look seamless rather than obviously joined. Consider the extra material cost involved, since a waterfall edge requires significantly more of your chosen countertop material than a standard installation. Pair the waterfall edge with simple, unfussy cabinetry elsewhere in the kitchen, letting this detail stand out as the island’s clear signature feature.
2. Mixed Material Island Base
Quick Benefits
- Adds visual interest and richness to the kitchen
- Creates a distinct, custom look for the island specifically
- Pairs well with a range of surrounding cabinetry styles
- Allows the island to feel like a true furniture piece
- Suits both traditional and contemporary kitchens
Why It Works
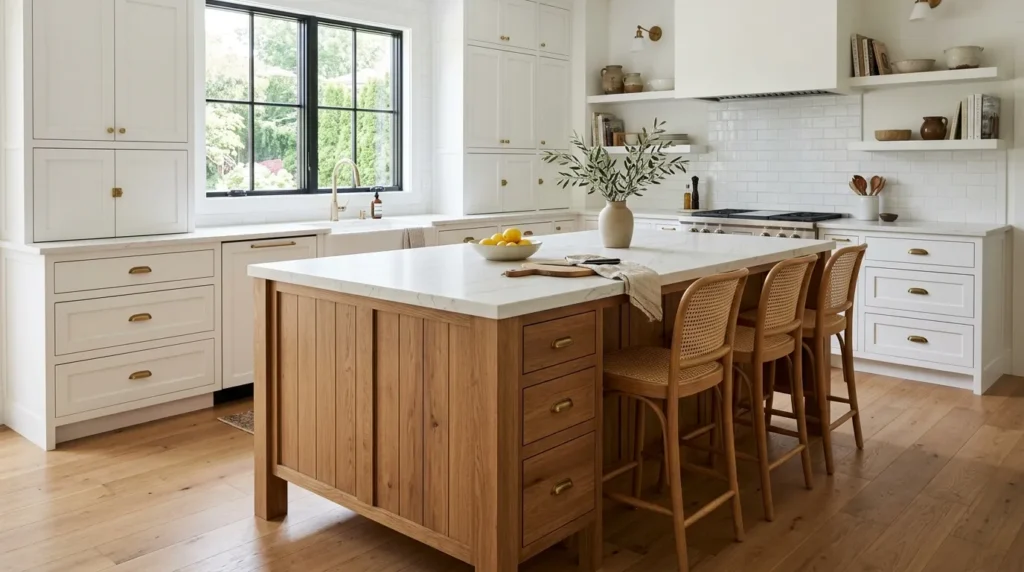
Building an island base from a different material than the surrounding cabinetry — a wood base against painted perimeter cabinets, or a metal frame against a wood island top — gives the island a distinct furniture-like quality that sets it apart as the kitchen’s clear centerpiece. That’s why many designers recommend a mixed material approach specifically for the island, since it’s the one piece in the room that can afford to stand out visually without disrupting the overall cohesion of the surrounding cabinetry. I’ve seen this idea work particularly well in kitchens aiming for a collected, less matchy-matchy look overall.
How To Style It
Choose a base material that complements your perimeter cabinetry’s tone without matching it exactly, such as a warm wood island base against white or cream painted surrounding cabinets. Metal accents, whether a metal shelf, a wrapped support leg, or brass trim details, can add another layer of material contrast if you want the island to feel even more distinctly furniture-like. Keep the island’s countertop material either matching the rest of the kitchen for cohesion, or intentionally different if you want the piece to stand out even further as a unique element. Balance a bold mixed-material island with simpler surrounding finishes, so the overall kitchen doesn’t feel like it’s competing with itself for visual attention.
3. Built-In Prep Sink Addition
Quick Benefits
- Reduces congestion at the main kitchen sink
- Improves workflow for meal prep and entertaining
- Particularly useful for households that cook frequently
- Adds significant functional value to the island
- Works well for multiple cooks working simultaneously
Why It Works
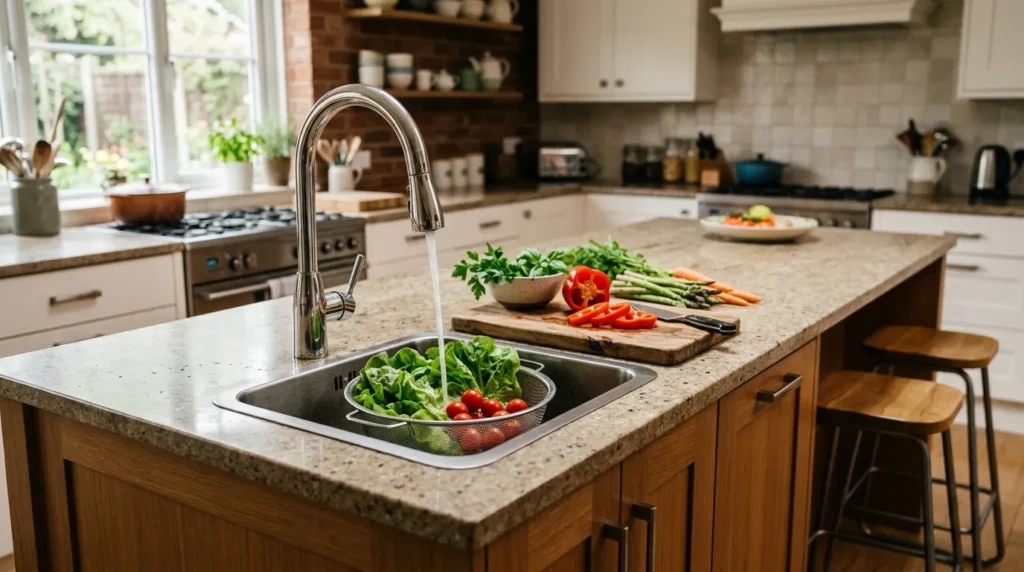
A secondary prep sink built into the island solves a genuine workflow problem in busy kitchens: congestion at the main sink when multiple tasks or multiple cooks are competing for the same water access. In my experience, households that cook elaborate meals frequently, or that regularly have more than one person working in the kitchen at once, get significant daily value from this addition, since it allows simultaneous tasks like washing vegetables and cleaning dishes to happen without one person waiting on the other. A mistake many homeowners make is adding a prep sink purely because it looks appealing in kitchen photos, without considering whether their actual cooking habits would make regular use of a second water source.
How To Style It
Position the prep sink toward one end of the island rather than dead center, preserving open counter space on the opposite end for actual food preparation and other tasks. Choose a smaller basin size than your main kitchen sink, since this fixture is meant to supplement rather than replace the primary sink for larger cleanup tasks. Include a small pull-down or gooseneck faucet suited to the prep sink’s more compact footprint. Ensure adequate plumbing planning during the design phase, since adding a second sink location requires additional water supply and drainage lines that are considerably easier to plan for upfront than to retrofit later.
4. Layered Pendant Lighting
Quick Benefits
- Serves as both function and design statement
- Improves task lighting for prep and dining at the island
- Creates a clear visual anchor above the island
- Available at a wide range of price points
- Adds warmth through choice of finish and glow
Why It Works
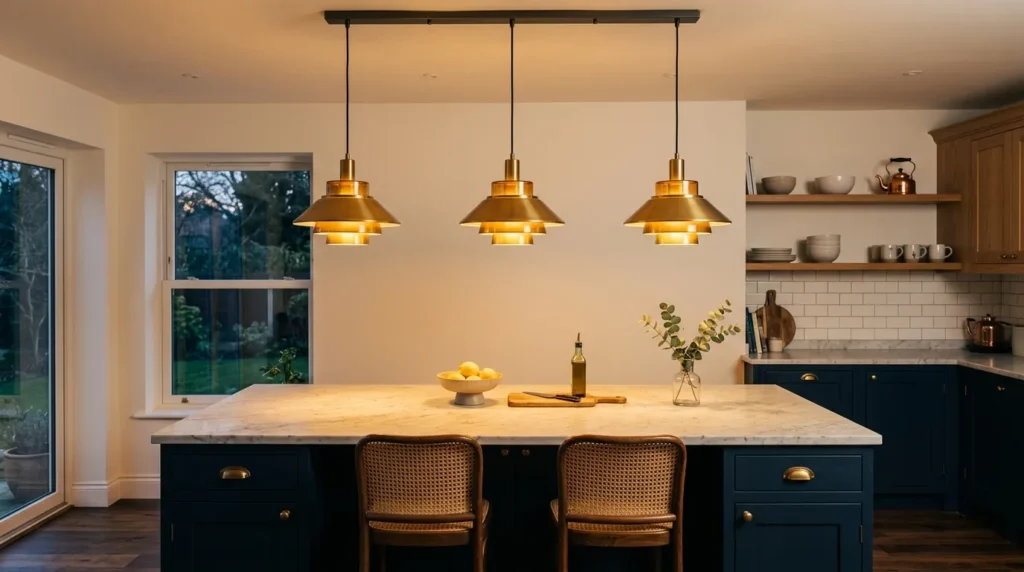
Pendant lighting above a kitchen island does double duty, providing genuinely useful task lighting for the work surface below while also serving as one of the most visible design statements in the entire kitchen. I’ve noticed that even a relatively simple island can feel considerably more finished and intentional once the right pendant lighting is added above it, since these fixtures draw the eye immediately and set a tone for the whole room’s overall style. A mistake many homeowners make is choosing pendants purely by style trend without considering the light output and placement needed for genuine task lighting over a prep and dining surface.
How To Style It
Choose two or three pendants for a standard-sized island, spacing them evenly and hanging them at a height that provides good task light without obstructing sightlines across the island for conversation or supervising kids at homework. A finish that echoes your other kitchen hardware, whether brass, matte black, or brushed nickel, helps tie the lighting into the room’s overall material story. Choose a warm-toned bulb for a cozier feel, particularly if the pendants will also be used during evening meals or entertaining. Consider dimmable fixtures for flexibility between bright task lighting during meal prep and a softer ambiance during dinner or gatherings.
5. Comfortable Counter Stool Seating
Quick Benefits
- Creates a casual gathering spot for meals and conversation
- Encourages family time centered around the kitchen
- Available in a wide range of styles and price points
- Works well for quick meals and homework alike
- Adds warmth and personality through fabric or material choice
Why It Works
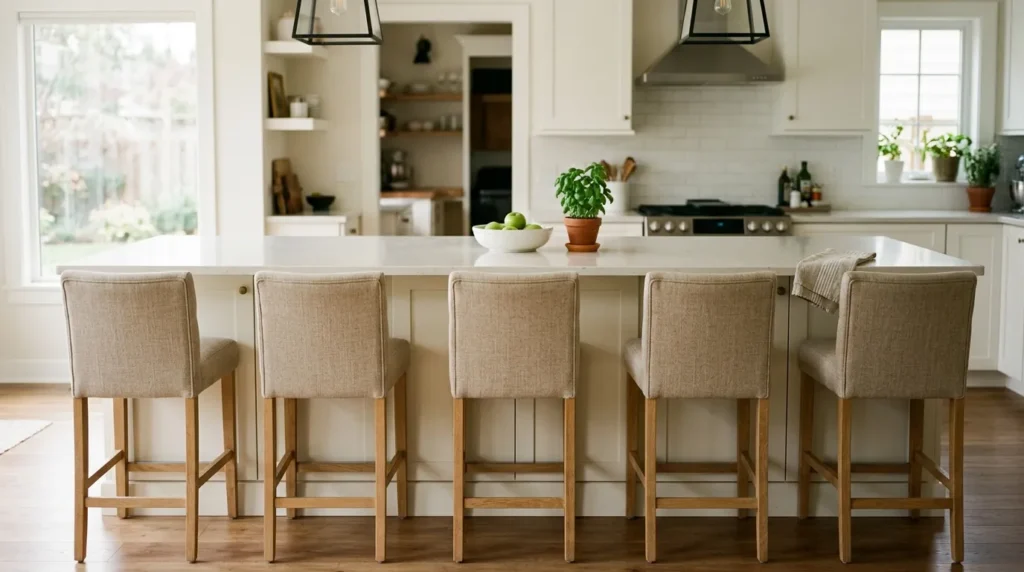
Counter stool seating at the island turns it into a genuine gathering spot, not just a food prep surface, which is often where a household actually spends the most time together during a typical week. In my experience, comfortable, well-chosen stools encourage people to linger at the island rather than immediately moving to a separate dining table, which can be a meaningful shift for households that want the kitchen to feel like a central, connected part of daily life. A mistake many homeowners make is prioritizing stool appearance over actual comfort, ending up with seating that looks great in photos but that no one wants to sit in for more than a few minutes.
How To Style It
Choose stools at the appropriate height for your specific island’s counter height, typically allowing for about ten to twelve inches of clearance between the seat and the counter surface for comfortable knee room. Upholstered stools with a bit of cushioning tend to encourage longer sitting for meals or homework compared to a purely hard wood or metal seat. Choose a durable, easy-to-clean fabric if opting for upholstery, since island seating sees frequent everyday use and occasional spills. Leave adequate spacing between stools, generally at least six inches, so seated guests have comfortable elbow room during meals.
6. Hidden Appliance Garage Storage
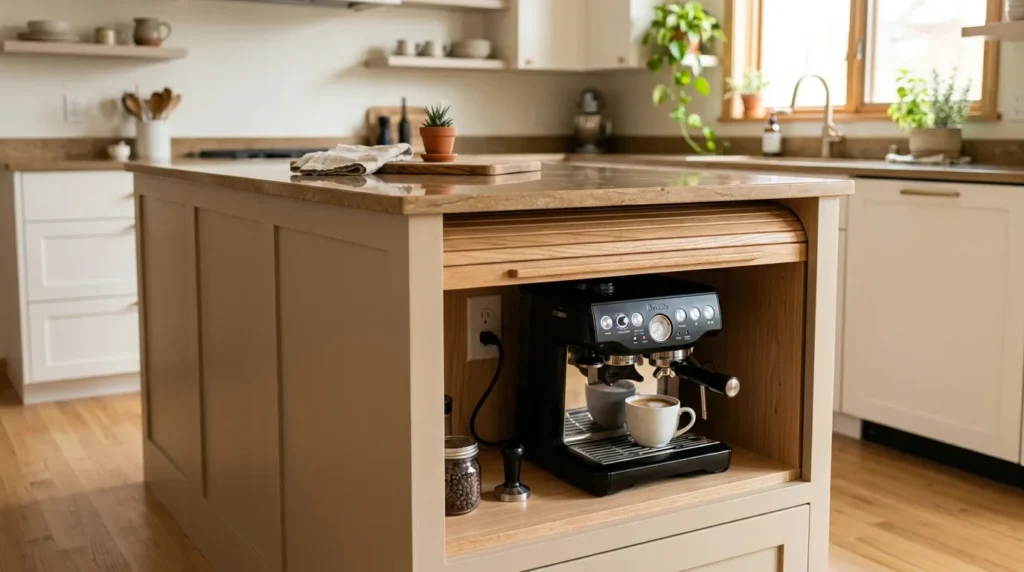
Quick Benefits
- Keeps small appliances accessible but out of sight
- Reduces visual clutter on the island’s countertop
- Improves everyday kitchen efficiency
- Works well for frequently used items like a coffee maker
- Maintains a clean, uncluttered island surface
Why It Works
An appliance garage, a cabinet with a retractable or lift-up door built specifically for small countertop appliances, solves the common tension between wanting frequently used items accessible and wanting an island surface that looks clean and uncluttered. That’s why many designers recommend this feature specifically for households that use appliances like a coffee maker or stand mixer daily, since it removes the need to store the item in a separate, less convenient cabinet while still keeping the countertop clear when not in active use. I’ve seen this idea work particularly well for anyone who values both a tidy aesthetic and genuine everyday convenience.
How To Style It
Include an appliance garage on the end of the island or integrated into the base near where a specific appliance is most frequently used, such as near an electrical outlet for a coffee maker or mixer. Choose a door style, whether a tambour roll-up or a simple lift-up panel, based on your available clearance and the specific appliance’s height. Include an outlet inside the garage itself, so the appliance can remain plugged in and ready to use without needing to be unplugged and replugged each time. Size the garage appropriately for your specific appliances, measuring their height and footprint before finalizing the cabinet dimensions.
7. Open Shelf Display Ends
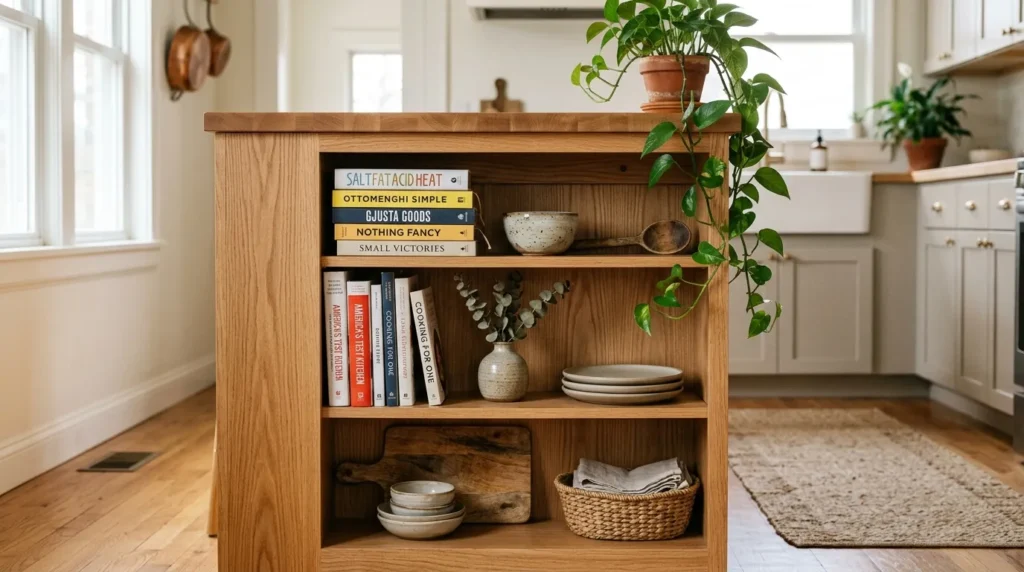
Quick Benefits
- Adds personality and visual interest to the island
- Provides display space for cookbooks or decorative items
- Softens the look of an otherwise solid cabinetry piece
- Budget-friendly detail to include in a new build
- Works well for both function and styling
Why It Works
Open shelving built into one or both ends of an island introduces a lighter, more personal visual element to what’s otherwise typically a solid block of cabinetry, giving you a spot to display cookbooks, a stack of woven baskets, or a few decorative pieces. I’ve noticed that this detail, while relatively small in terms of actual square footage, often gets more compliments than larger, more expensive island features, simply because it adds a personal, curated touch to an otherwise purely functional piece of furniture. A mistake many homeowners make is skipping this kind of detail during the planning phase, then wishing afterward they had a spot for this kind of display.
How To Style It
Include one or two open shelves on an end panel of the island, ideally positioned where they’ll be visible from the main kitchen sightline or an adjacent living space if your kitchen is open concept. Style the shelves with a mix of practical items, like frequently used cookbooks, and a few purely decorative pieces, such as a small plant or a ceramic bowl. Leave some negative space on the shelves rather than filling them completely, since a slightly curated, breathing display reads as more intentional than an overstuffed one. Keep the shelf styling loosely coordinated with the rest of your kitchen’s color palette so it feels connected rather than randomly placed.
8. Contrasting Island Color Choice
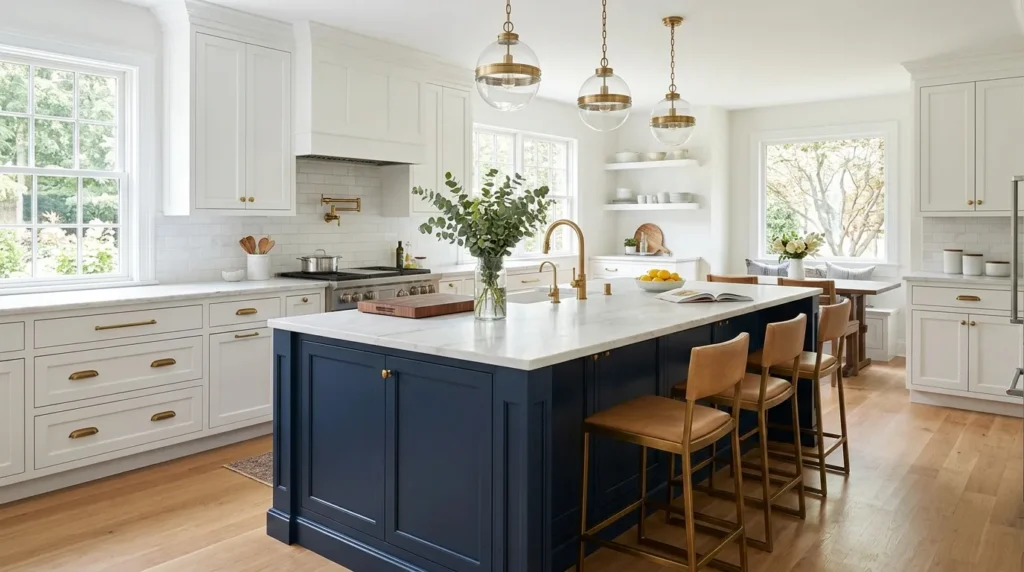
Quick Benefits
- Creates a strong focal point through color alone
- Allows perimeter cabinetry to stay neutral and versatile
- Adds personality without a full kitchen color commitment
- Works well in kitchens of nearly any size
- Easier to update later than a full-kitchen color change
Why It Works
Painting or choosing an island in a color that contrasts with the surrounding perimeter cabinetry is one of the most popular ways to add personality to a kitchen without committing to a bold color throughout the entire room. In my experience, this approach lets a household experiment with a color they love — a deep navy, a rich green, a warm terracotta — in a contained, lower-risk way, since only the island itself needs repainting or refinishing if tastes change down the road. A mistake many homeowners make is choosing a bold color for the entire kitchen at once, when a contrasting island offers a similar personality boost with considerably less commitment and cost if the choice needs to be revisited later.
How To Style It
Choose a contrasting color for the island that complements rather than clashes with your perimeter cabinetry’s undertone, testing paint samples in your actual kitchen lighting before committing to the final choice. Deep, saturated colors like navy, forest green, or a rich charcoal tend to work particularly well for this kind of focal-point island, since they read as intentional and sophisticated rather than simply mismatched. Keep hardware and countertop material consistent between the island and perimeter cabinetry, letting the color contrast do the visual work without introducing too many additional variables. If you’re uncertain about committing to a bold color, testing with a large painted sample board positioned near the island for a few days can help confirm the choice before final application.
9. Butcher Block Prep Surface
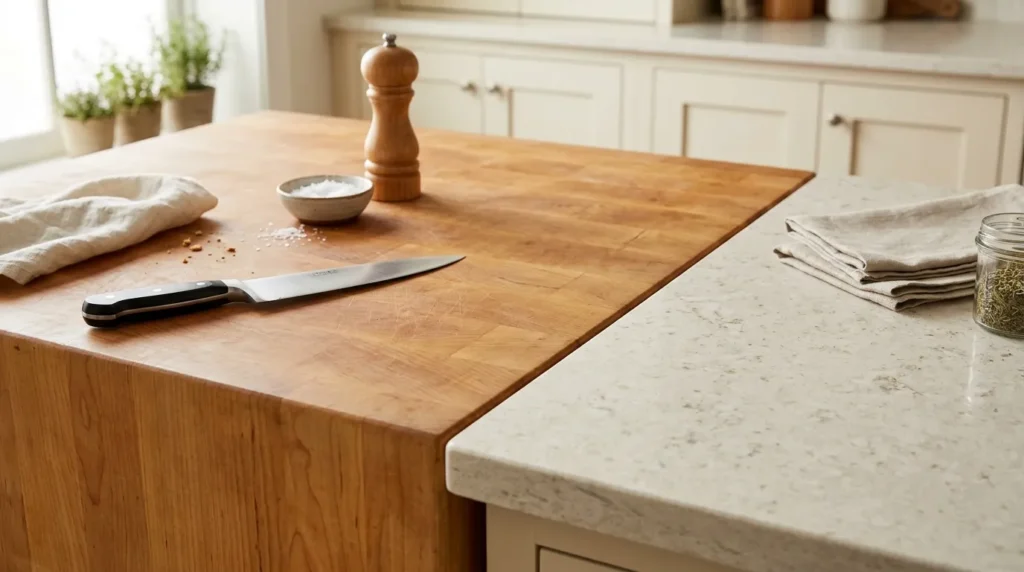
Quick Benefits
- Provides a warm, functional cutting and prep surface
- Adds material contrast against surrounding countertops
- Suitable for direct food preparation with proper care
- Ages beautifully with regular maintenance
- Works well in both traditional and modern kitchens
Why It Works
A butcher block section on the island, whether covering the entire surface or just a portion of it, brings genuine warmth and material contrast while also providing a surface that’s actually suited to direct food preparation, unlike some stone countertops that require a cutting board for this purpose. I’ve seen this idea used particularly well as a partial island surface, combining a stone or quartz section for general use with a dedicated butcher block section specifically for chopping and food prep. A mistake many homeowners make is choosing butcher block purely for its appearance without understanding the ongoing maintenance, like regular oiling, needed to keep the surface properly sealed and food-safe.
How To Style It
Choose a hardwood like maple or walnut for durability if opting for a butcher block surface, since these woods hold up better to the repeated knife contact and moisture exposure typical of kitchen prep work. Consider a partial butcher block section combined with a more durable stone or quartz surface elsewhere on the island, which balances the warmth of wood with a lower-maintenance material for general everyday use. Oil the butcher block regularly according to the manufacturer’s care instructions, since proper maintenance significantly extends the surface’s lifespan and keeps it food-safe for direct prep work. Avoid placing hot pots or pans directly on the butcher block, since this can cause scorching or warping over time.
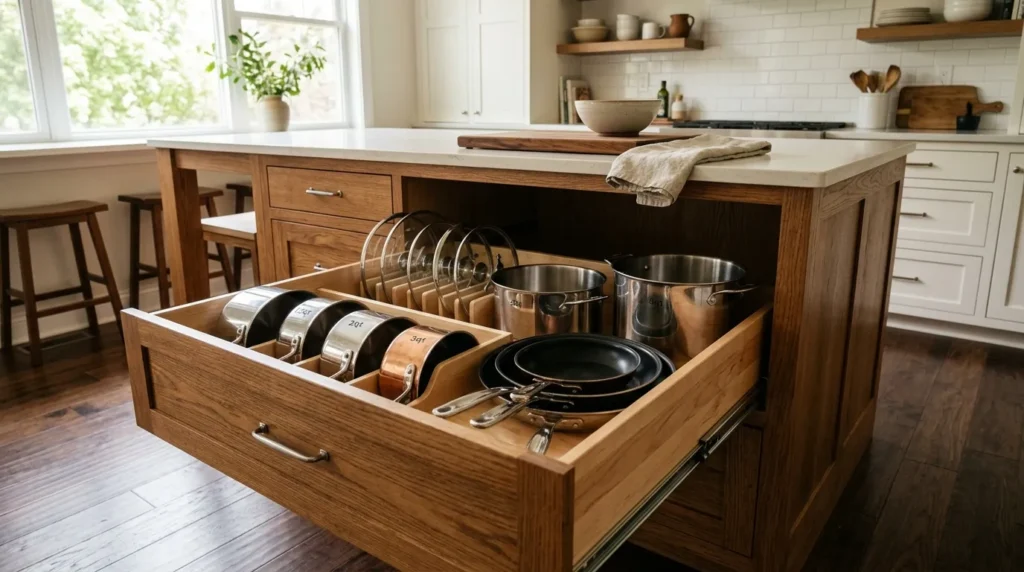
10. Deep Drawer Storage Systems
Quick Benefits
- Maximizes storage for pots, pans, and bulky cookware
- Improves accessibility compared to lower cabinet shelving
- Reduces the need to bend and dig through stacked items
- Available in a range of sizes and configurations
- Suits households with substantial cookware collections
Why It Works
Deep drawers in the island base offer significantly better accessibility for pots, pans, and bulky cookware compared to traditional lower cabinet shelving, where items often get stacked and require digging through the pile to reach something at the back. In my experience, households that cook frequently and own a substantial collection of cookware get real, daily value from this kind of storage upgrade, since pulling out a full drawer to see everything at once is considerably more convenient than reaching into a deep, dark cabinet. That’s why many designers recommend deep drawers specifically for the island base rather than standard cabinet doors, particularly for the section nearest the stove or primary cooking zone.
How To Style It
Choose drawer sizes based on your specific cookware collection, measuring your largest pots and pans before finalizing dimensions to ensure everything fits comfortably without excessive stacking. Soft-close drawer mechanisms add a nicer, quieter everyday experience and reduce wear on the cabinetry over time compared to standard hardware. Consider a drawer organizer or peg system for lids specifically, since these tend to be one of the more awkward items to store neatly even within an otherwise well-organized deep drawer. Position the deepest drawers nearest the stove or cooking zone, keeping the items you’ll reach for most often during actual cooking as close as possible to where they’ll be used.
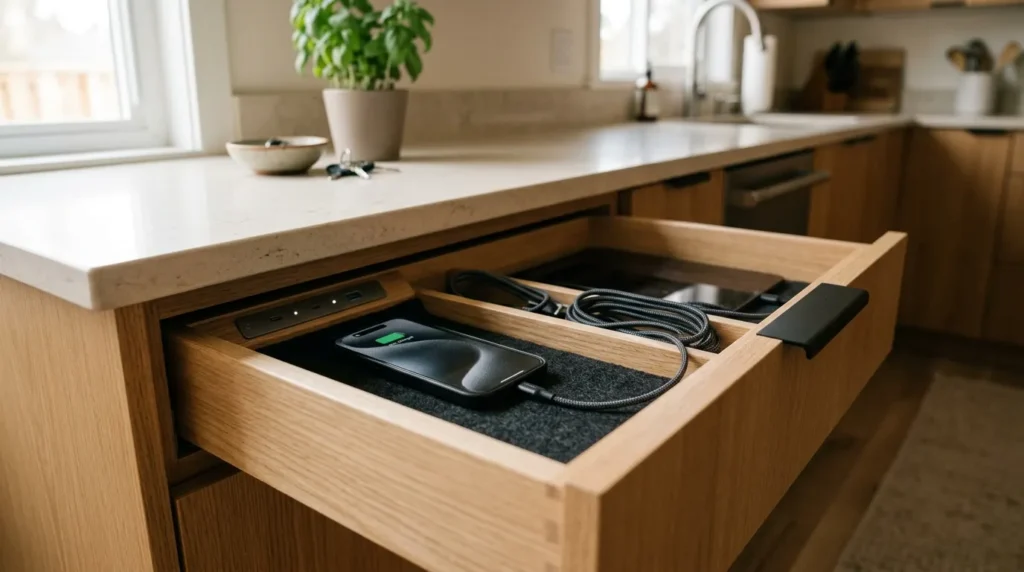
11. Charging Station Integration
Quick Benefits
- Keeps devices charged and organized in a central spot
- Reduces cord clutter on the countertop
- Practical addition for households with multiple devices
- Available as a simple outlet upgrade or full built-in station
- Adds genuine everyday convenience
Why It Works
A dedicated charging station built into the island addresses the very modern reality of multiple devices needing to charge throughout the day, often ending up as a tangle of cords across the countertop without a designated spot. A mistake many homeowners make is treating this as an afterthought, plugging chargers into whatever outlet happens to be nearby, rather than planning a specific, contained spot for this purpose during the initial island design. I’ve noticed that even a simple built-in charging drawer or a designated outlet with a small cord management solution makes a meaningful difference in keeping the island’s countertop genuinely clear for actual cooking and dining tasks.
How To Style It
Include a dedicated outlet, ideally with USB and USB-C ports built in, positioned in a spot that’s convenient but not directly in the main food prep zone. A shallow drawer with a small cutout for cords allows devices to charge while tucked out of sight, keeping the countertop clear of visible cables and chargers. Consider a wireless charging pad built into a section of the countertop for households that primarily use compatible devices, eliminating cords for at least some charging needs. Plan electrical requirements during the initial design phase if possible, since adding dedicated outlets or built-in charging features is considerably easier to wire in during construction than to retrofit into a finished island later.
Frequently Asked Questions
How big should a kitchen island be?
Island size depends heavily on your kitchen’s overall dimensions, but a common general guideline is maintaining at least 36 to 42 inches of clearance on all sides for comfortable walking and workflow space. Most standard islands range from about six to ten feet in length, though smaller kitchens may need a more compact version or a movable cart-style island instead. Consulting with a kitchen designer for your specific space helps ensure the island is appropriately scaled rather than either cramped or overwhelming.
What’s the best countertop material for a kitchen island?
Quartz and granite are popular choices for durability and low maintenance, while marble offers a classic look with more required care around staining and etching. Butcher block adds warmth and is suitable for direct food prep but requires regular oiling to maintain. The right choice depends on your household’s cooking habits, maintenance preferences, and overall kitchen style.
Should my kitchen island match my perimeter cabinets?
It doesn’t have to, and many kitchens benefit from a bit of intentional contrast between the island and surrounding cabinetry, whether through color, material, or both. A contrasting island creates a natural focal point and gives the kitchen a bit more visual interest than an entirely matched palette. That said, keeping some element consistent, like hardware finish or countertop material, helps the overall kitchen feel cohesive even with a contrasting island.
How many stools should I include at my kitchen island?
This depends on the island’s length, with a general guideline of about 24 inches of counter width allotted per stool for comfortable seating. A typical eight-foot island might comfortably seat three to four stools with adequate spacing between them. Leaving a bit of open counter space without seating, if your island length allows, can also provide flexibility for tasks that don’t require a stool pulled up.
Is a prep sink worth adding to a kitchen island?
A prep sink is most valuable for households that cook frequently, entertain often, or regularly have multiple people working in the kitchen at once, since it reduces congestion at the main sink. For households with simpler cooking routines or a single primary cook, the added plumbing cost and reduced counter space may not offer as much daily value. Considering your actual cooking habits and kitchen traffic is the best way to determine whether this feature makes sense for your specific household.
What lighting works best above a kitchen island?
Pendant lighting is the most common and effective choice, providing both task lighting for the work surface and a clear design statement for the room. Two or three pendants, evenly spaced and hung at a height that doesn’t obstruct sightlines, generally work well for a standard-sized island. Choosing a finish that matches your other kitchen hardware helps tie the lighting into the room’s overall cohesive look.
Conclusion
A kitchen island works best when it’s designed around how your household actually uses the kitchen, not just how it photographs in a showroom. From a waterfall countertop edge and layered pendant lighting to deep drawer storage and a built-in charging station, each of these ideas adds genuine everyday function alongside real visual appeal, and the right combination depends entirely on your specific cooking habits and household needs.
If you’re planning or updating your own kitchen island, start by listing out exactly how you want to use the space, then choose the features from this list that support those specific needs rather than trying to include everything at once. A well-planned island tends to become the true heart of the home, and getting the details right from the start makes a meaningful difference in how much you enjoy using it every day.
Start with one or two ideas and gradually build a space that reflects your style and supports everyday comfort.
Related Articles
- 10 French Style Kitchen Ideas with Timeless Beauty
- 10 Laundry Room Ideas
- 10 Home Organization Ideas
- Small Living Room Ideas with Budget-Friendly Decor
- Neutral Home Styling Tips